Upload your first dataset
Drop a file into the portal and get a hosted, tiled, styleable layer — then describe it so the rest of your organization can find it.
Uploading requires the Editor role or higher. Everything you upload is visible to your whole organization by default; you can make an item Private afterwards.
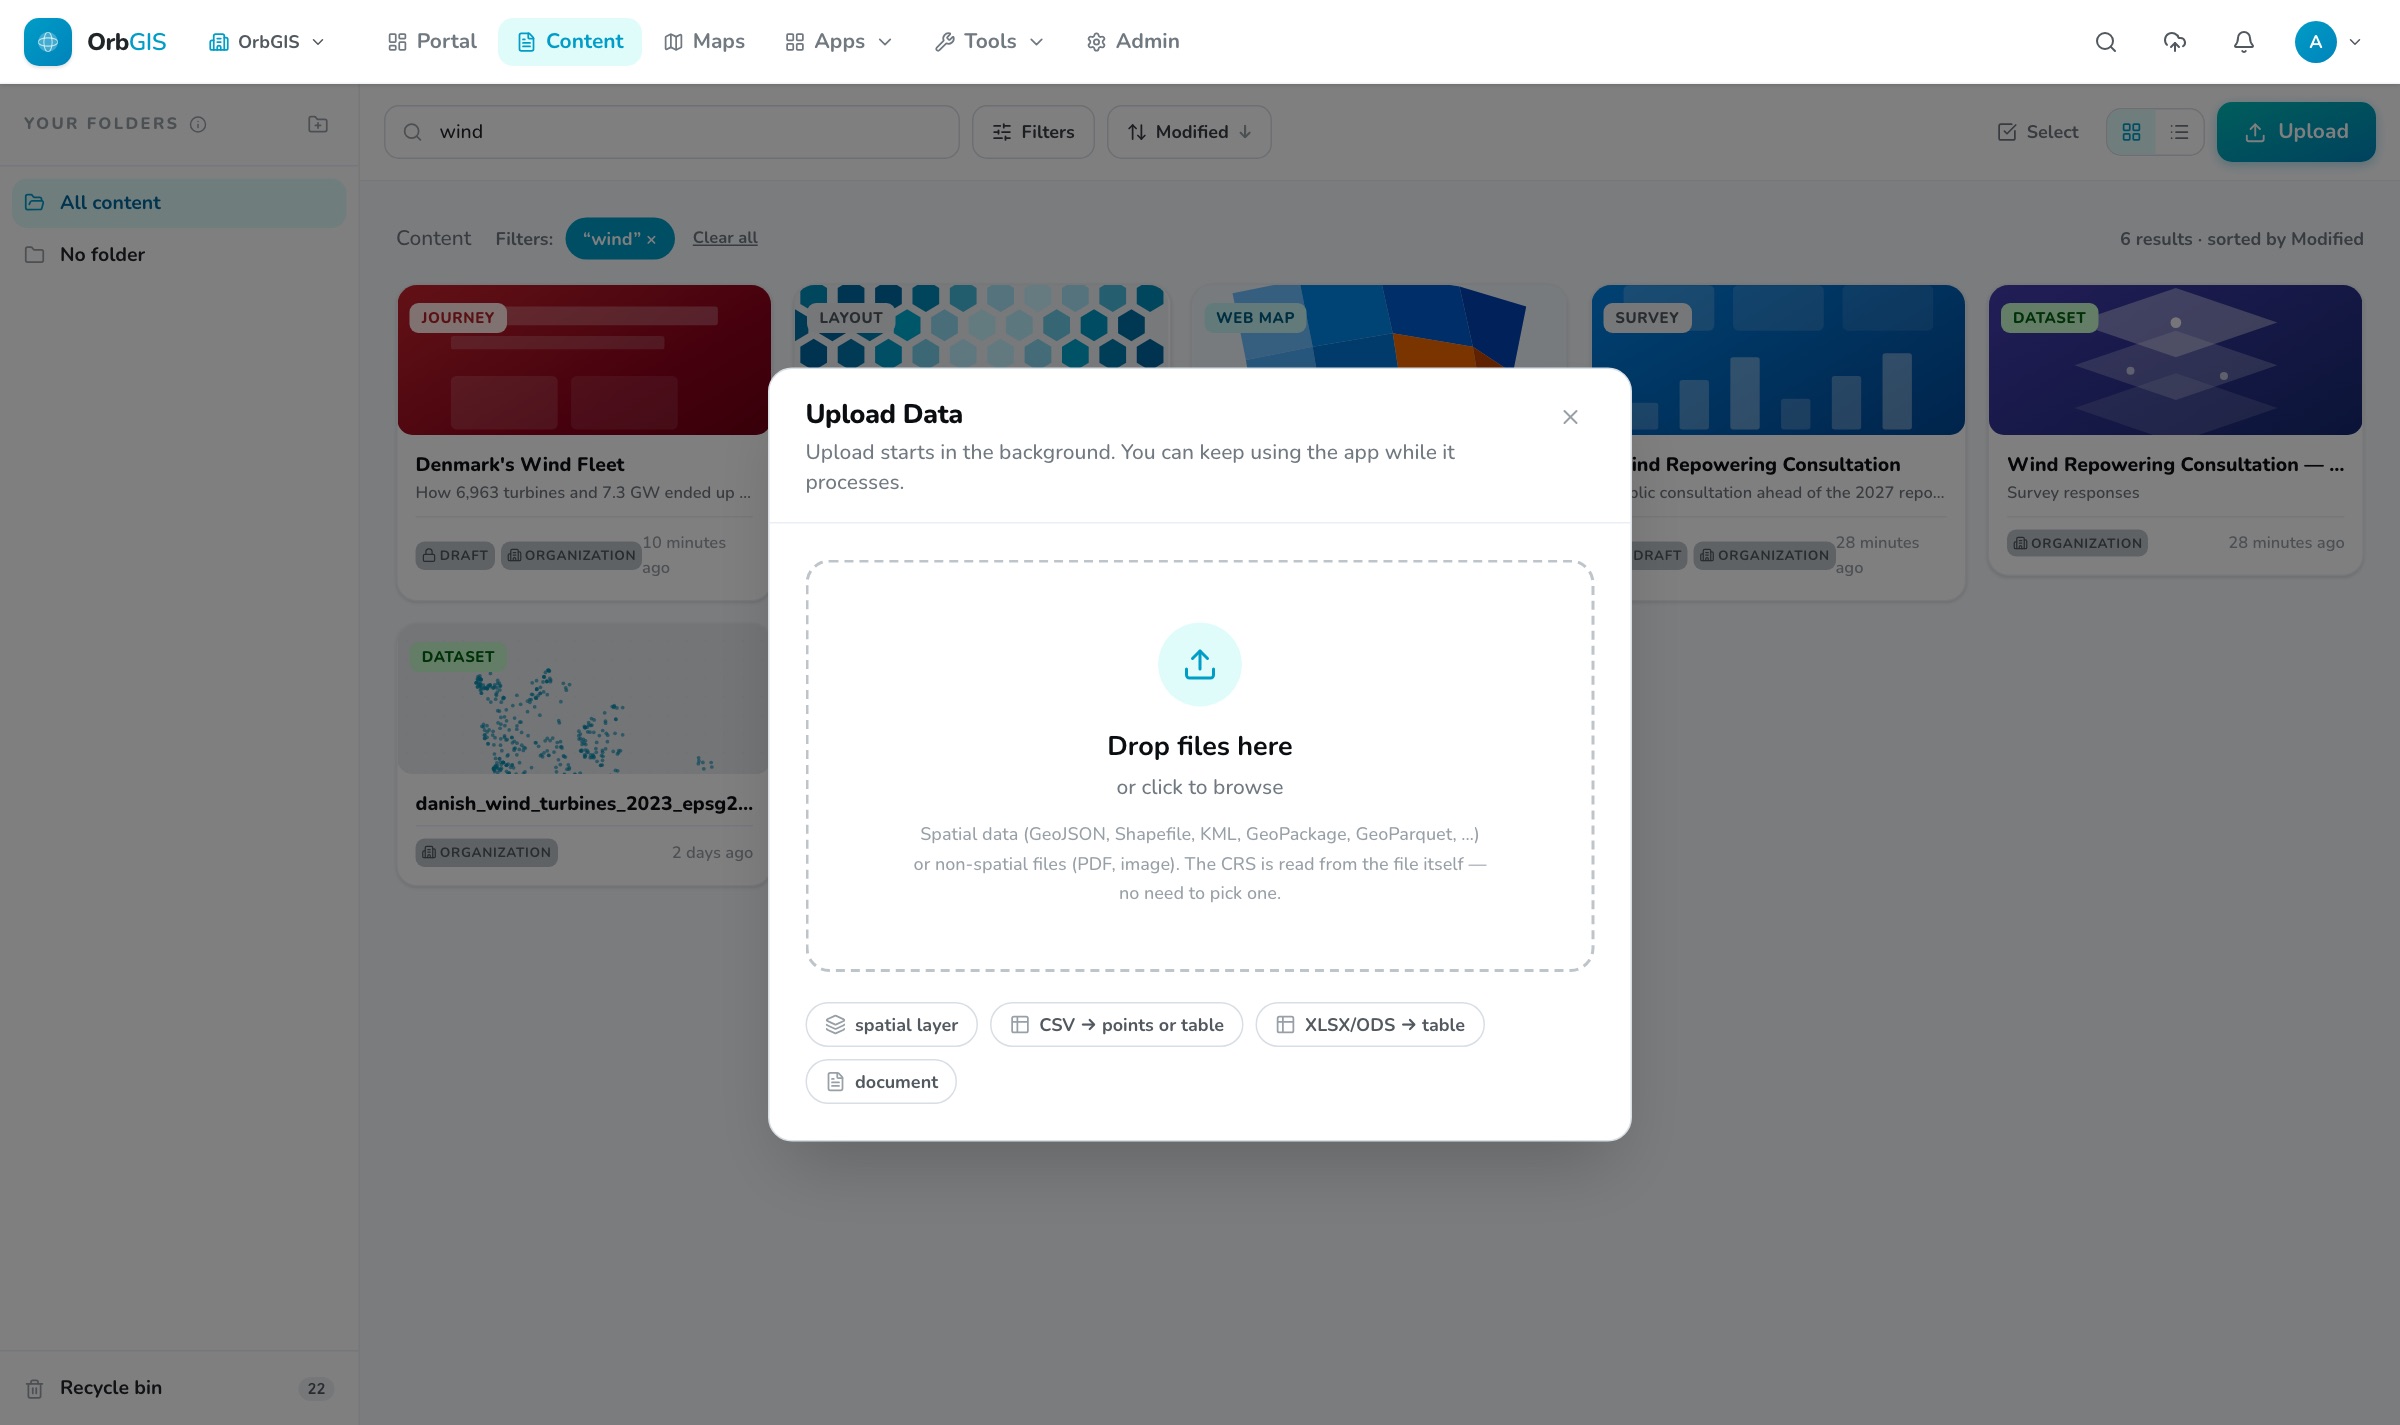
Open the upload dialog
Press Upload data on the portal home, or Upload in the Content browser. Uploading from inside a folder files the result there.
Drop the file
Drag files onto the drop zone or click to browse. Spatial formats: GeoJSON, Shapefile (zipped), GeoPackage, KML/KMZ, GML, GPX, DXF, FlatGeobuf and GeoParquet. Tabular: CSV, XLSX and ODS. Anything else — PDF, images — is stored as a plain file item.
Skip the CRS question
There is nothing to pick. The coordinate system is read from the file itself, and the layer is stored in it — no silent reprojection to Web Mercator. See Coordinate reference systems.
Answer the CSV question, if asked
A CSV can become either a point layer — choose the latitude and longitude columns, which OrbGIS usually detects for you — or a table with no geometry that you join to other layers later.
Let it run
Press upload and carry on working. The Uploads panel in the header tracks each file through its phases — receiving, reading the layer, importing features, optimizing, calculating the extent — and offers Cancel while it runs and Open when it finishes.
Describe what you uploaded
Open the new item and fill in a Summary, a Description and a few tags. Tags feed the content browser’s filters, so this is what makes the dataset findable by anyone other than you.
Decide who sees it
On the item page, Ownership is either Organization (everyone in your org) or Private (just you and portal admins). This is separate from publishing to the open web — see Sharing & publishing.
What you get#
A spatial upload becomes a hosted feature layer: a typed attribute table, a spatial index, a computed extent, vector tiles for the map viewer and — for large datasets — automatic overviews so it stays fast when zoomed out. From there it can go straight into a map, a dashboard or QGIS.
Organizing as you go#
- Folders are personal. Your folder tree only organizes your own view of the content browser — nobody else sees it. Shared findability comes from titles, descriptions and tags.
- Deleting an item moves it to the Recycle bin at the bottom of the folder list, where it stays restorable for 30 days — see Recycle bin.
- Uploading a newer version of the same data? Use Overwrite in the Data Editor so existing maps keep working.
Size ceilings: 5 GB for spatial and spreadsheet files, 200 MB for CSV, 2 GB for a GeoTIFF basemap, 100 MB for documents and images. The full pipeline is described in Uploading data.