Create your first Journey
Build a scroll-driven story around your maps: a cover, narrative text, an embedded map, stat callouts and a guided map tour — then publish it to a public URL.
Building journeys requires the Editor role or higher; publishing one publicly requires Publisher or Admin. Have a saved web map ready first — see Create your first map.
Create the journey
Open Apps → Journeys and press New journey. Pick Blank journey or the built-in Guided article template — intro, map, narrative, stat callouts and a closing section to fill in — then press Create. The editor opens on the cover.
Write the cover
Click straight into the cover to type a kicker, the title and a subtitle. Open Design → Cover for the six cover layouts (three full-bleed, three split), a cover image or video with a focal point and overlay control, and an Author byline.
Add a text block
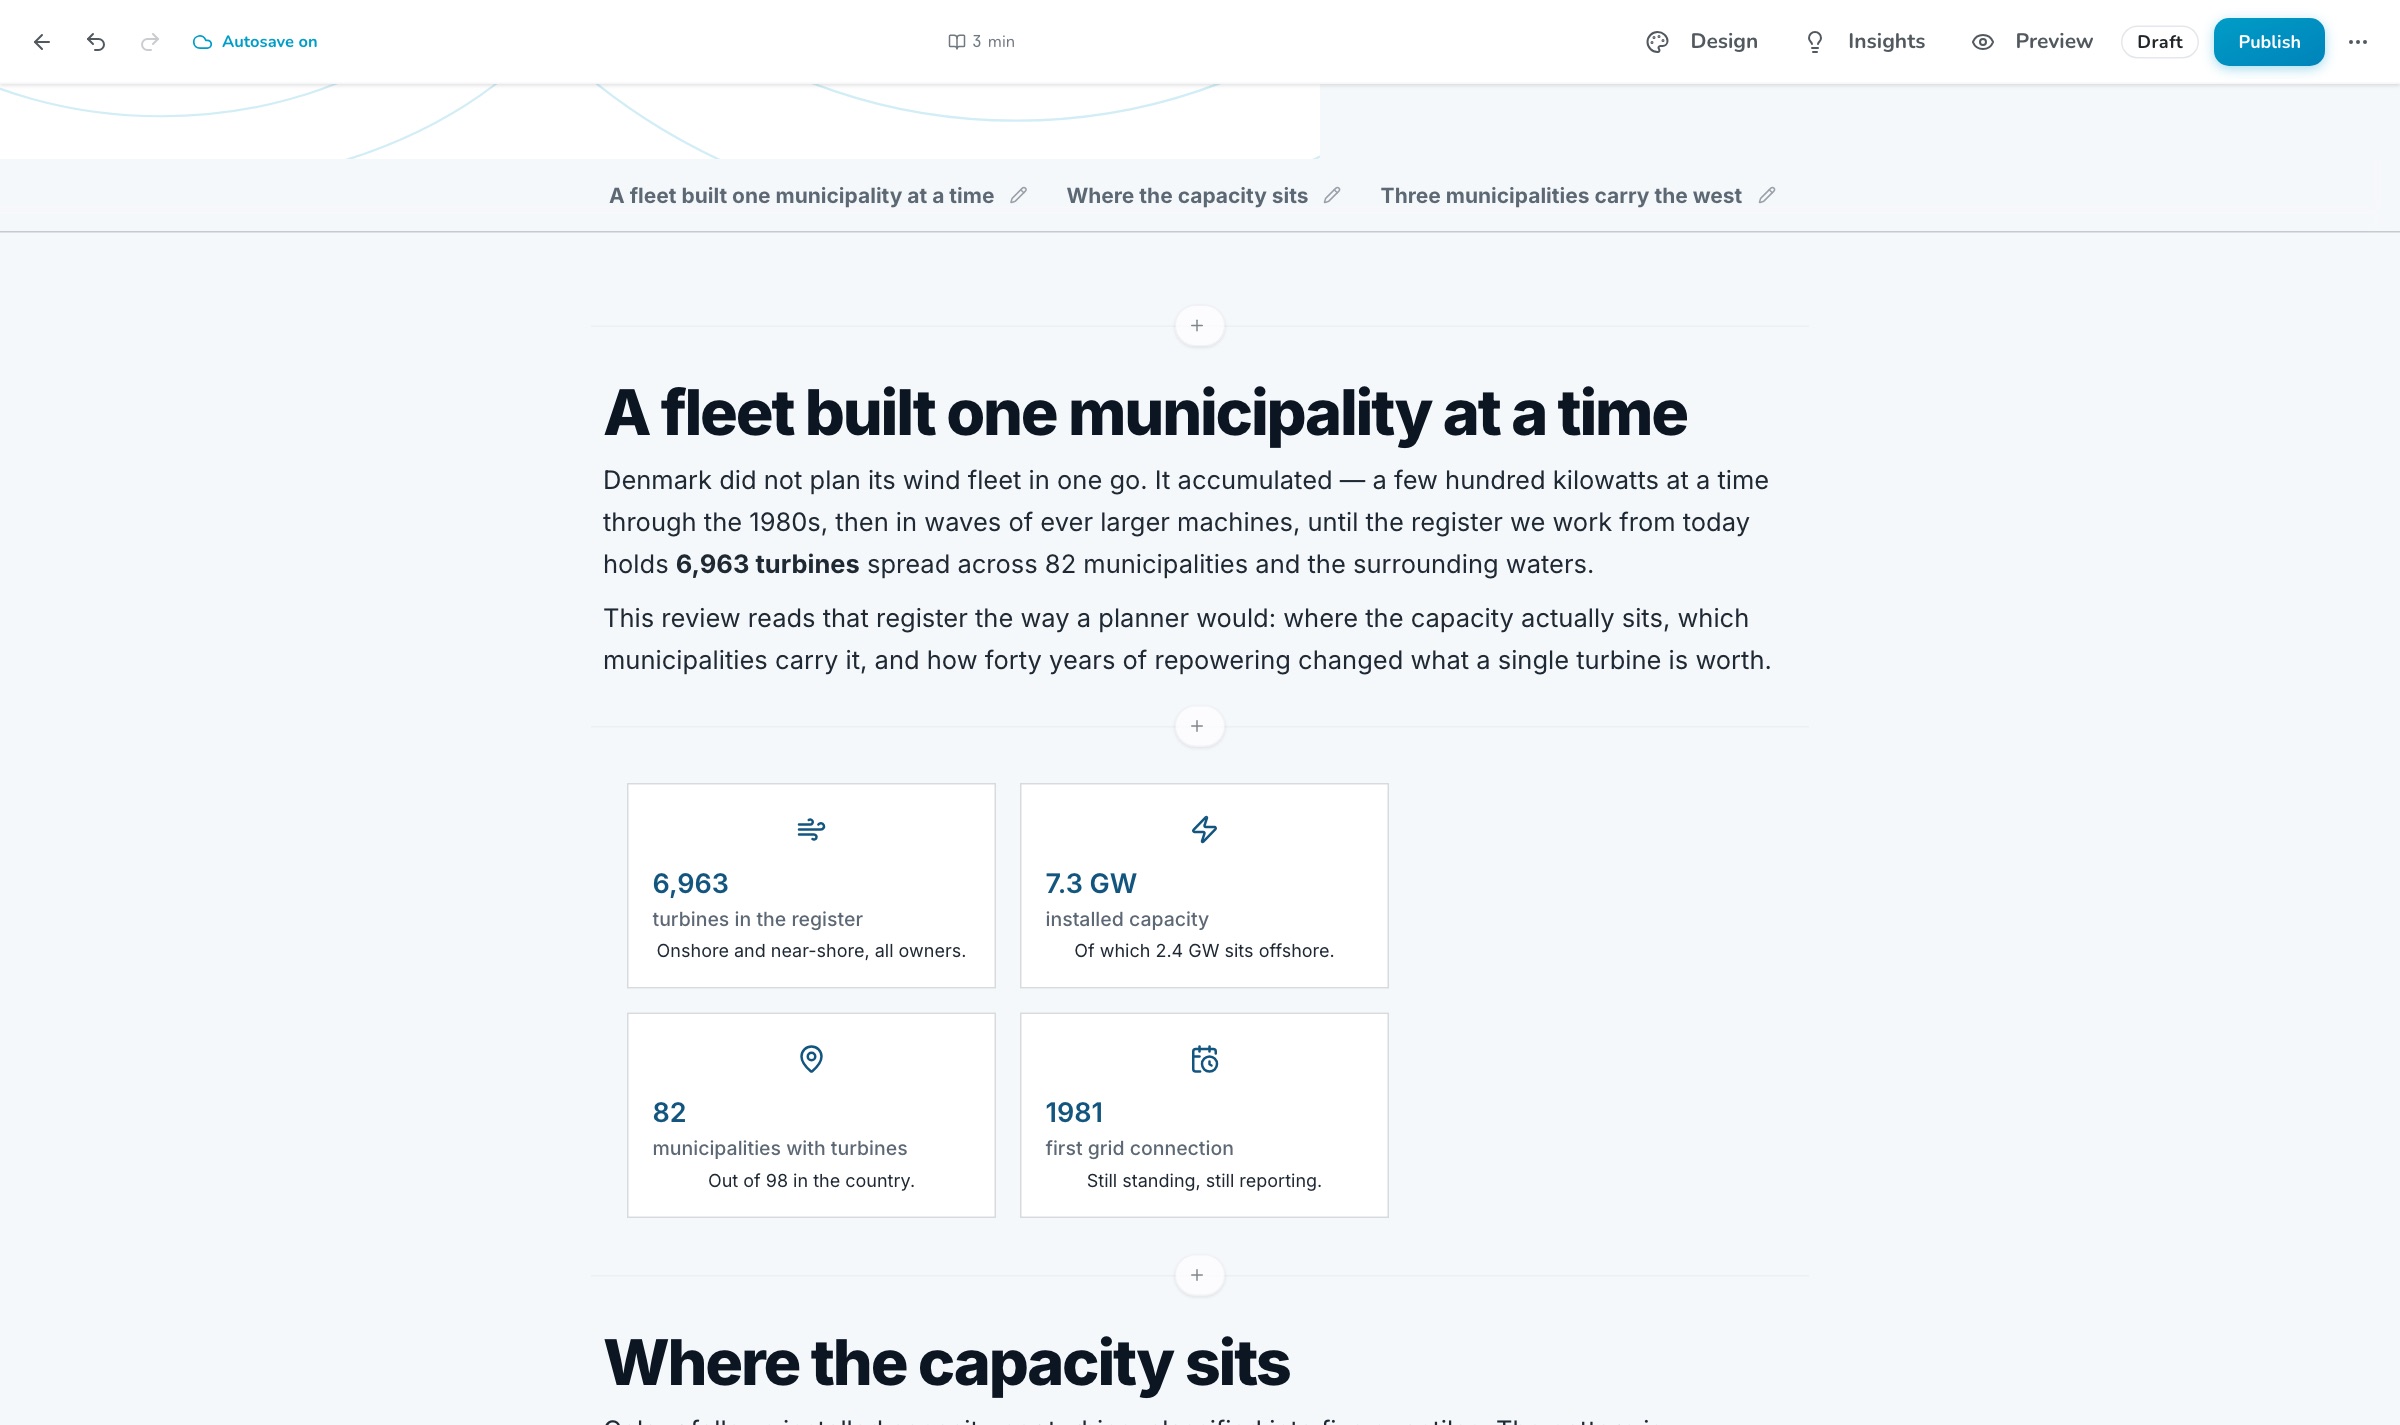
Hover between blocks and press Add element, then Text. Write with the usual formatting — headings, lists, links. Every top-level heading becomes an entry in the reader’s section navigation; switch that on under Design → Optional sections → Navigation.
Embed a map
Add element → Map, then choose a web map. In Configure map pick which of its layers stay visible, the block height (small, medium, large or full viewport), whether readers can pan and zoom, and whether to show a title and a compact legend.
Add stat callouts
Add element → Infographic gives you up to eight stat cards in one to four columns. Each card takes an icon, a value like
7.3 GW, a label and an optional description. Four layouts: Basic, Stacked, Icon top, Icon left.Add a map tour
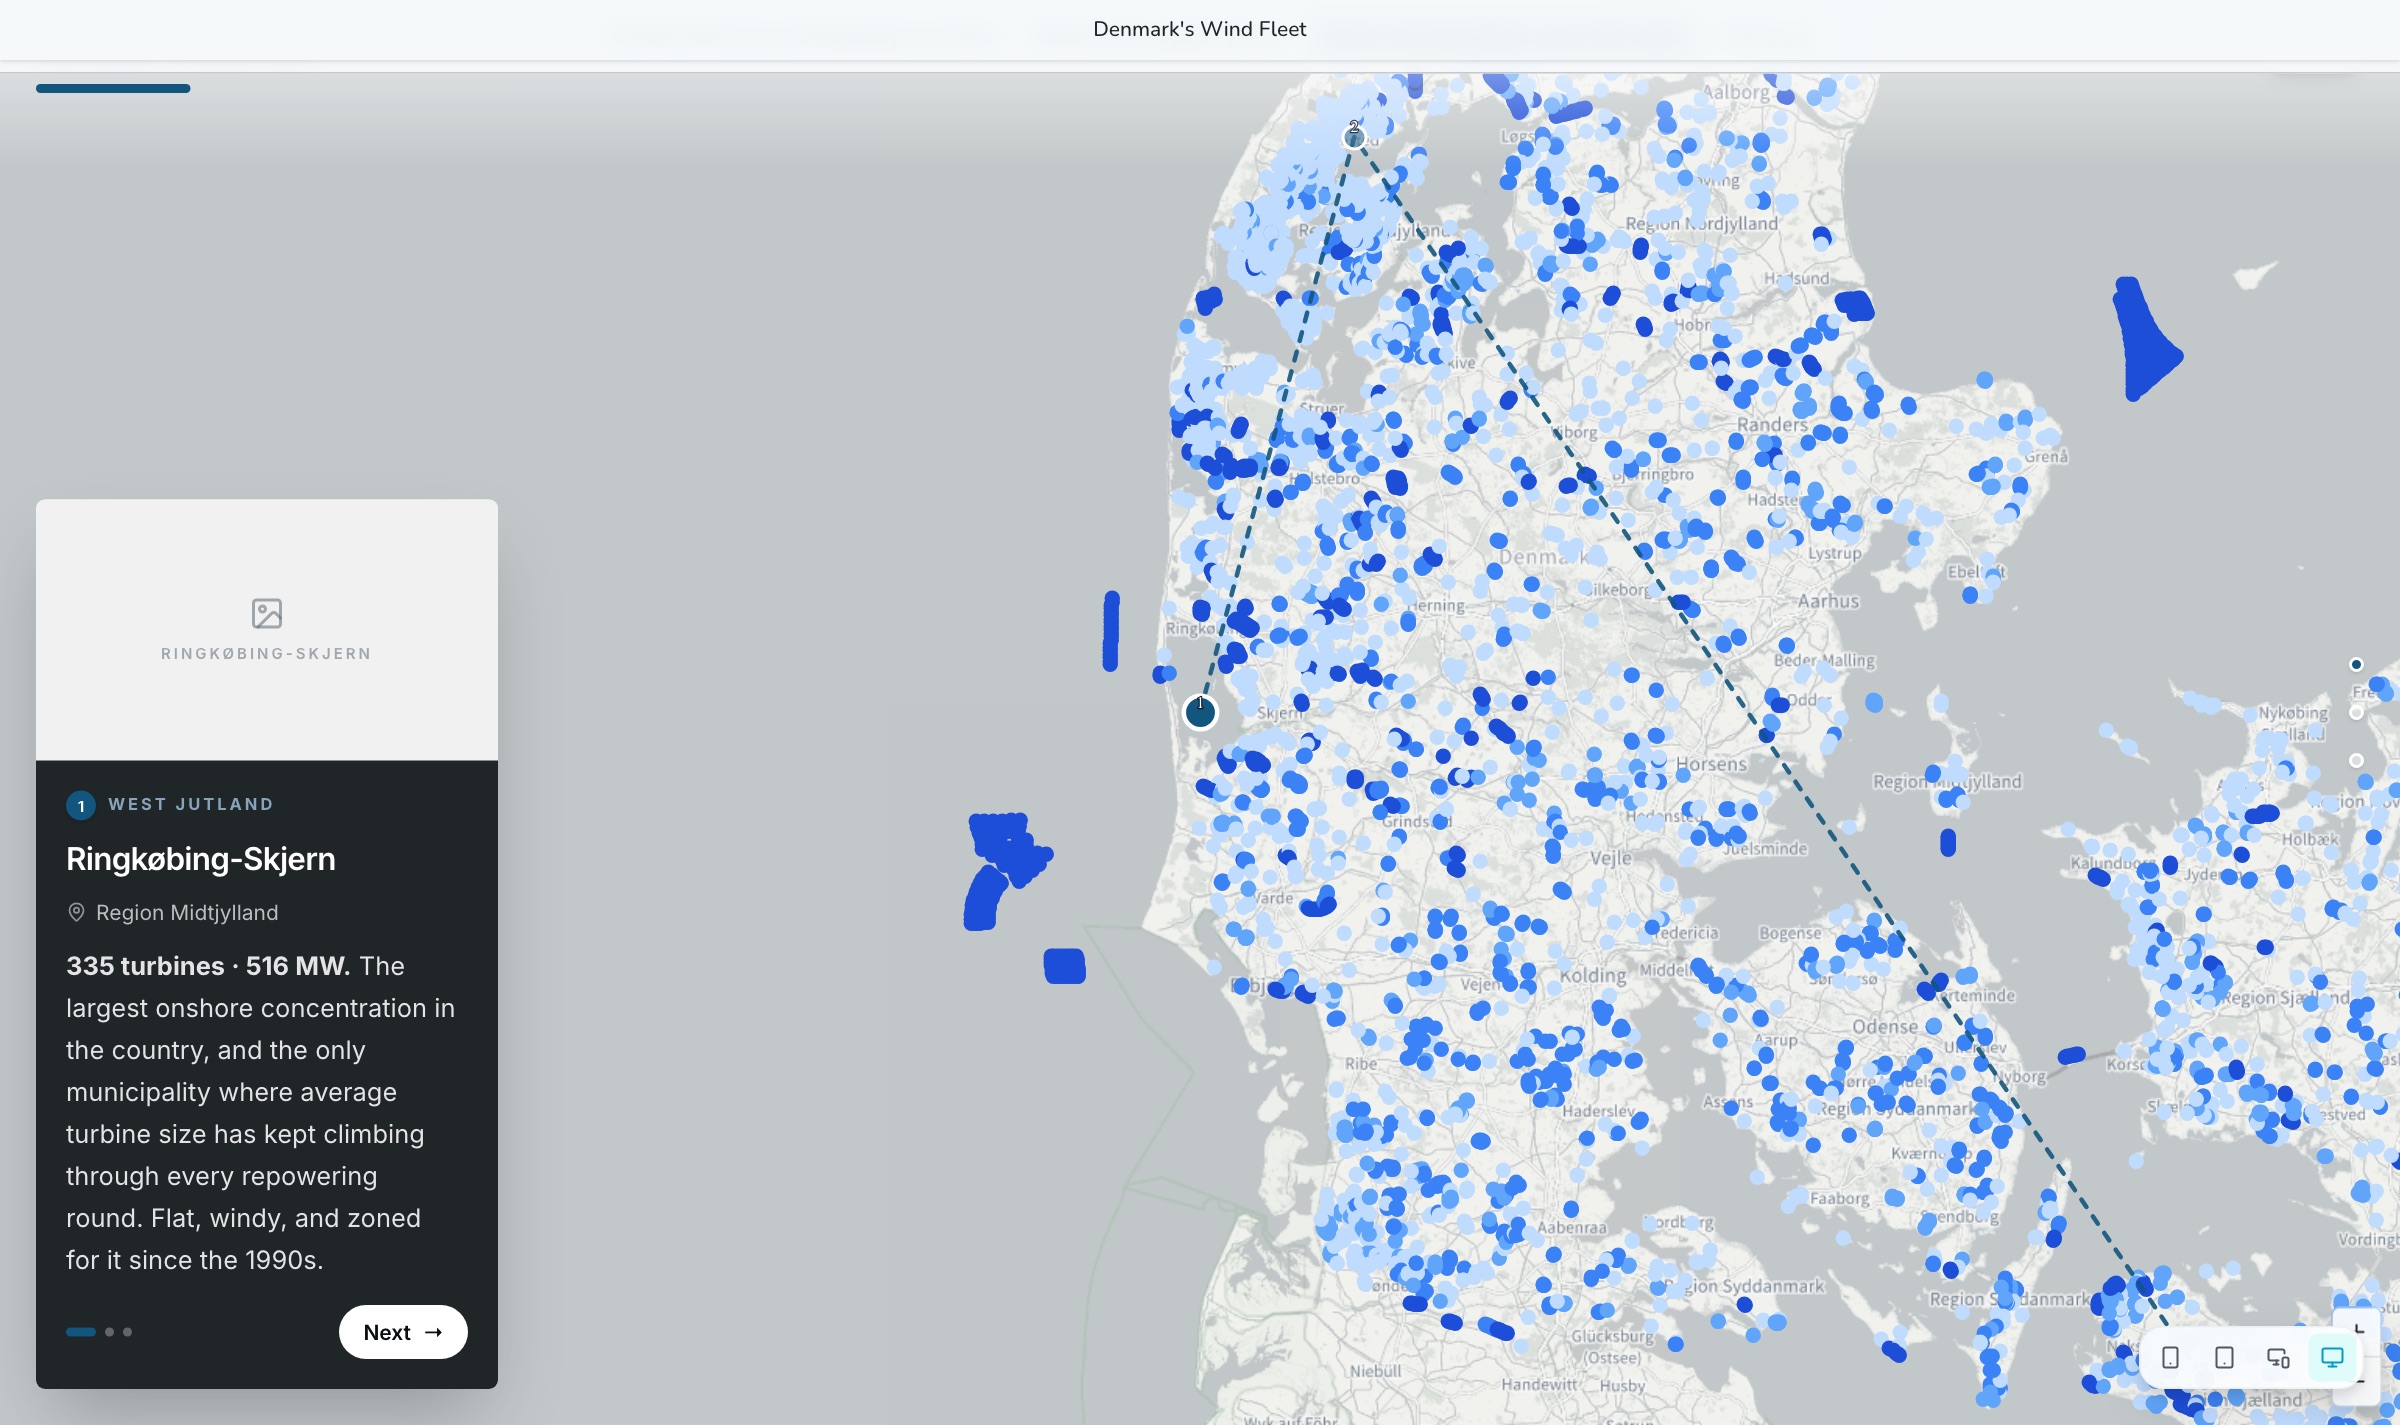
Under Immersive, Add element → Map tour. Choose a template — Story Rail, Immersive Map or Editorial Scroll — then a map. Each stop gets a title, a category tag, an address, rich text, optional media and its own pin; a dashed route connects them in order.
Theme it
Open Design → Theme and pick one of your organization’s themes, or leave it on the org default. Colors, fonts, radius and spacing all switch together — see Create your first theme.
Preview and publish
Preview opens the reader view in a new tab. Publish opens a sidesheet that lists exactly which datasets become publicly readable, then gives you the public link (
your-org.orbgis.se/your-journey) and a QR code.
How saving works#
Journeys autosave about a second and a half after you stop typing. The header shows Autosave on, then Unsaved, Saving… and Saved as it goes. Undo and redo are Cmd/Ctrl+Z and Cmd/Ctrl+Shift+Z. If the same journey was saved from another session, a banner offers Reload rather than overwriting the other copy.
Where to go next#
- The full block reference — all ten block types, the six cover layouts, credits and the three map-tour templates — is in Journeys.
- Compare two maps side by side with a Swipe block, or set a series of dates with a Timeline block.
- A journey may hold up to 50 blocks; a map tour up to 50 stops; a gallery 2–30 images.
Publishing exposes the layers behind every embedded map. Check the dataset list in the publish sidesheet before you press the button — Sharing & publishing explains what becomes readable.